
Building Terminal Tools with Go
Introduction
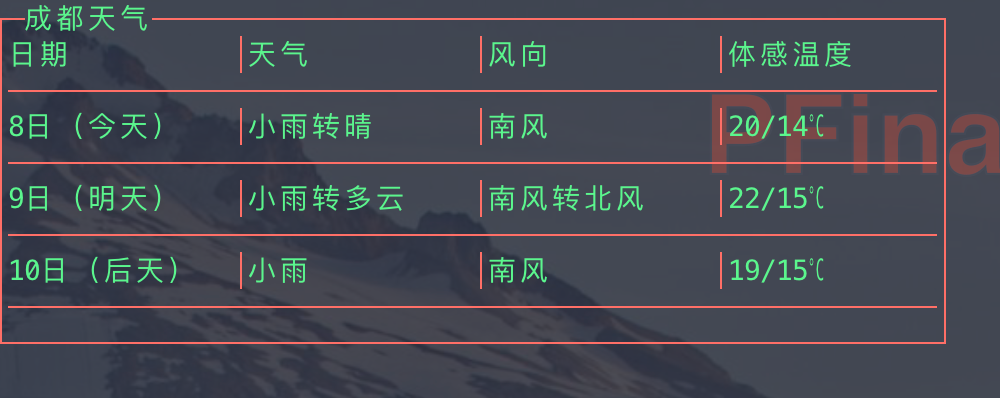
Inspired by a Rust-based terminal weather tool, I set out to create a similar, yet distinct, command-line utility using Go. The result is a flexible and practical CLI tool:
Go's strengths—simplicity, performance, and a rich standard library—combined with powerful community packages, make building effective terminal tools straightforward and enjoyable.
The Cobra Library: Your CLI Foundation
Cobra is the leading library for creating robust command-line interfaces in Go. It's the backbone of CLIs for Kubernetes, Hugo, and GitHub CLI, offering a powerful API and a scaffolding tool.
Installation
To install the Cobra CLI generator tool:
go install github.com/spf13/cobra-cli@latestTip: Ensure the
cobra-clicommand is available in yourPATH(usually~/go/binor$GOPATH/bin).
Getting Started
Create a new project directory and initialize it with Cobra:
shellmkdir my_cli_tool && cd my_cli_tool cobra-cli initThis generates a foundational project structure:
├── LICENSE
├── README.md
├── cmd
│   └── root.go
├── go.mod
├── go.sum
├── main.go
└── pkg (Consider renaming 'pak' to 'pkg' for Go convention)
    ├── mobile.go
    └── weather.go
Understanding
cmd/root.go: This file defines the root command of your application.gopackage cmd import ( "fmt" "os" "github.com/spf13/cobra" ) // rootCmd represents the base command when called without any subcommands var rootCmd = &cobra.Command{ // Use: The name that the command will use in the CLI. Use: "my_cli_tool", // Short: A brief description, shown in `help` output. Short: "A brief description of your application.", // Long: A more detailed description. Long: `A longer description of your application.
You can add examples and detailed usage information here.`, // Run: The function executed when the root command is called directly. // If the root command typically just shows help, you might leave this simple // or even omit it and let Cobra show help by default. Run: func(cmd *cobra.Command, args []string) { // Example: Show a welcome message or basic usage if called without subcommands fmt.Println("Welcome to my_cli_tool! Use 'my_cli_tool help' for available commands.") }, }
// Execute adds all child commands to the root command and handles startup.
// This is called by main.go. It only needs to happen once.
func Execute() {
    // This is where the magic happens. Cobra parses os.Args and executes the matching command.
    err := rootCmd.Execute()
    if err != nil {
        // A non-nil error from Execute usually indicates a problem (like flag parsing error)
        // or a command explicitly called os.Exit(). We exit the program.
        os.Exit(1)
    }
}

// init is called before main(), used for setting up flags.
func init() {
    // Persistent flags are global for the application.
    // rootCmd.PersistentFlags().StringVar(&cfgFile, "config", "", "config file (default is $HOME/.my_cli_tool.yaml)")

    // Local flags apply only to the root command.
    // rootCmd.Flags().BoolP("toggle", "t", false, "Help message for toggle")

    // Example of adding a version flag
    rootCmd.Flags().BoolP("version", "v", false, "Print the version number")
    // You would then check this flag inside the Run function or a PersistentPreRun hook.
}
```
Core cobra.Command Properties:
Use: The command's name and usage pattern.Short: A one-line description.Long: A detailed description, often including examples.Run: The function containing the command's primary logic.Args: A validator for command arguments (e.g.,cobra.ExactArgs(2),cobra.MinimumNArgs(1)).
Adding Subcommands
Cobra's power lies in its ability to create a hierarchy of commands.
To add a subcommand for mobile number lookup:
cobra-cli add mobileThis creates cmd/mobile.go:
package cmd

import (
    "fmt"
    "github.com/spf13/cobra"
    // Import your application's logic package
    // "my_cli_tool/pkg"
)

// mobileCmd represents the mobile command
var mobileCmd = &cobra.Command{
    Use:   "mobile <phone_number>",
    // It's good practice to define argument requirements in `Use` and `Args`
    Args:  cobra.ExactArgs(1), // This command requires exactly one argument
    Short: "Lookup mobile number information",
    Long: `This command queries a database or API to find the carrier,
region, and other details associated with a given mobile phone number.`,
    Run: func(cmd *cobra.Command, args []string) {
        // args[0] will contain the phone number provided by the user
        phoneNumber := args[0]
        fmt.Printf("Looking up information for number: %s\n", phoneNumber)

        // Here you would call your application's logic, e.g.:
        // info, err := pkg.LookupMobile(phoneNumber)
        // if err != nil {
        //     fmt.Fprintf(cmd.OutOrStderr(), "Error: %v\n", err)
        //     return
        // }
        // ... process and display 'info' ...
    },
}

// init is called before main(), registering the subcommand with its parent.
func init() {
    // This is the key line that attaches the subcommand to the root command.
    rootCmd.AddCommand(mobileCmd)

    // Define flags specific to the 'mobile' subcommand here.
    // mobileCmd.Flags().StringP("format", "f", "json", "Output format (json, text)")
}
Similarly, add a weather command:
cobra-cli add weatherEach new subcommand file must register itself with its parent command (usually rootCmd) in its init function.
Beautiful Terminals with TermUI
For a more engaging user experience, TermUI is an excellent library for building dynamic, visual terminal dashboards using widgets.
Installation
With Go modules, installation is simple:
go get github.com/gizak/termui/v3Import the packages in your command's Run function:
import (
    ui "github.com/gizak/termui/v3"
    "github.com/gizak/termui/v3/widgets"
)
Then run go mod tidy to update dependencies.
Layout Examples
Weather Query with Table Widget
// Inside your weather command's Run function
func runWeatherCmd(cmd *cobra.Command, args []string) {
    // ... logic to fetch weather data into 'weatherData' ...
    // Assume weatherData has fields like City and a slice of DailyForecasts

    // Initialize TermUI
    if err := ui.Init(); err != nil {
        // Log the error and potentially fall back to plain text output
        fmt.Fprintf(cmd.OutOrStderr(), "Failed to initialize UI: %v\n", err)
        return
    }
    // Ensure cleanup happens when the function exits
    defer ui.Close()

    // Create a new Table widget
    table := widgets.NewTable()
    table.Title = fmt.Sprintf("Weather Forecast for %s", weatherData.City)
    table.BorderStyle = ui.NewStyle(ui.ColorCyan)

    // Define table headers
    table.Rows = [][]string{
        {"", "Date", "Condition", "High (°C)", "Low (°C)"}, // Empty string for row index/column
    }

    // Populate table rows with data
    for i, day := range weatherData.Forecast {
        table.Rows = append(table.Rows, []string{
            fmt.Sprintf("[%d]", i+1), // Row index
            day.Date,
            day.Condition,
            day.High,
            day.Low,
        })
    }

    // Style the table
    table.TextStyle = ui.NewStyle(ui.ColorWhite)
    table.TitleStyle = ui.NewStyle(ui.ColorWhite, ui.ColorCyan, ui.ModifierBold)
    table.HeaderRowSeparator = true // Add a line under the header

    // Set the widget's position and size (x, y, width, height)
    table.SetRect(0, 0, 70, 15)

    // Render the widget to the terminal
    ui.Render(table)

    // Event loop to keep the UI alive and handle exit
    uiEvents := ui.PollEvents()
    for {
        e := <-uiEvents
        // Exit on 'q' key press or Ctrl+C
        if e.ID == "q" || e.ID == "<C-c>" {
            return // This exits the Run function, triggering defer ui.Close()
        }
        // You could handle other events here, like window resizes
        // if e.Type == ui.ResizeEvent { ... }
    }
}
Mobile Number Lookup with List Widget
// Inside your mobile command's Run function
func runMobileCmd(cmd *cobra.Command, args []string) {
    phoneNumber := args[0]
    // ... logic to fetch mobile info into 'mobileInfo' ...

    // Initialize TermUI
    if err := ui.Init(); err != nil {
        fmt.Fprintf(cmd.OutOrStderr(), "Failed to initialize UI: %v\n", err)
        return
    }
    defer ui.Close()

    // Create a new List widget
    list := widgets.NewList()
    list.Title = "Mobile Number Details"

    // Populate list rows
    list.Rows = []string{
        fmt.Sprintf("📱 Phone Number: %s", mobileInfo.Number),
        fmt.Sprintf("📡 Carrier:      %s", mobileInfo.Carrier),
        fmt.Sprintf("📍 Province:     %s", mobileInfo.Province),
        fmt.Sprintf("🏠 City:         %s", mobileInfo.City),
        fmt.Sprintf("📮 Zip Code:     %s", mobileInfo.ZipCode),
        fmt.Sprintf("📞 Area Code:    %s", mobileInfo.AreaCode),
    }

    // Style the list
    list.TextStyle = ui.NewStyle(ui.ColorYellow)
    list.TitleStyle = ui.NewStyle(ui.ColorBlack, ui.ColorYellow, ui.ModifierBold)
    list.WrapText = true // Allow text to wrap within the list item's width

    // Set dimensions
    list.SetRect(0, 0, 50, 12)

    // Render the list
    ui.Render(list)

    // Event loop for exit
    uiEvents := ui.PollEvents()
    for {
        e := <-uiEvents
        if e.ID == "q" || e.ID == "<C-c>" {
            return
        }
    }
}
Key Points for TermUI:
ui.Init()anddefer ui.Close(): Essential for setting up and tearing down the terminal UI.- Widgets: Create (
widgets.NewTable(),widgets.NewList()), configure (title, style, data), and position (SetRect). ui.Render(widget): Displays the widget.- Event Loop: Use
ui.PollEvents()to keep the UI responsive and capture user input (like 'q' to quit). - Styling: Use
ui.NewStyle(fg, bg, modifier)to customize appearance. - Error Handling: Gracefully handle
ui.Init()errors, potentially falling back to standard text output.
Source Code
You can find a complete, working example based on these principles at:
https://github.com/PFinal-tool/pf_tools
(Note: The linked repository corresponds to the previous article's content. You can use the improved code snippets above as a guide to build or enhance it.)
Happy coding and enjoy building your own powerful and visually appealing Go-powered terminal tools!