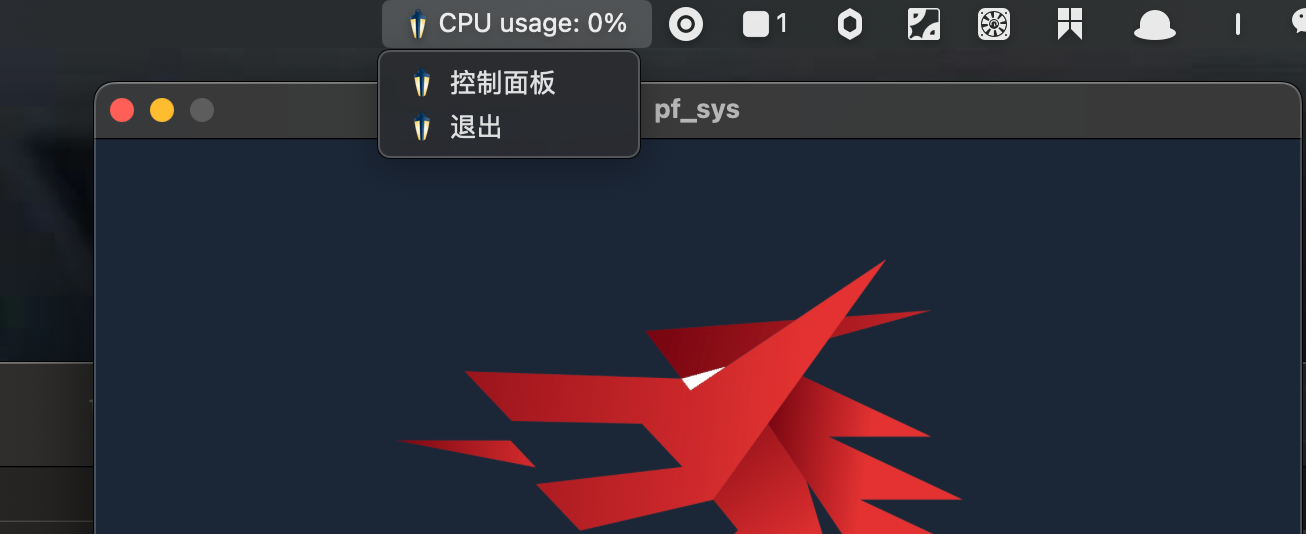
在上一篇文章中,我们介绍了如何使用 wails 与第三方扩展包 getlantern/systray 配合开发带有托盘功能的系统工具。由于 wails v2 版本并不原生支持 systray 类似的托盘功能,因此我们通过将 getlantern/systray 作为子程序运行,并且通过进程间通信来解决这一问题。
这篇文章将详细讲解如何实现两个进程之间的通信,并完善相关功能。

进程间通信
在这个项目中,使用管道(pipe)来在主程序和子进程之间进行数据通信。管道是一种非常轻量的通信方式,适用于本地的进程间通信场景。
wails 的启动与关闭
在 wails 的应用中,需要在程序启动和关闭时处理与子进程的通信。为此,在 OnStartup 和 OnShutdown 回调中设置相应的逻辑:
1
2
3
| OnStartup: app.startup,
OnShutdown: app.closeup,
|
管道的创建与管理
app.go 在 startup 方法中,创建了两个管道,一个用于主程序向子进程发送数据,另一个用于接收子进程发送的数据。
1
2
3
4
5
6
7
8
9
10
11
12
13
14
15
16
17
18
19
20
21
22
23
24
25
26
27
28
29
30
31
32
33
34
35
|
func (a *App) startup(ctx context.Context) {
a.ctx = ctx
sendPipeR, sendPipeW, err := os.Pipe()
if err != nil {
fmt.Println("创建发送管道失败:", err)
return
}
receivePipeR, receivePipeW, err := os.Pipe()
if err != nil {
fmt.Println("创建接收管道失败:", err)
return
}
a.sendPipeW = sendPipeW
a.sendPipeR = sendPipeR
a.receivePipeR = receivePipeR
a.receivePipeW = receivePipeW
go func() {
cmd := exec.Command("go", "run", "./pak/sys_run/systray_run.go")
cmd.Stdin = a.sendPipeR
cmd.Stdout = a.receivePipeW
cmd.Stderr = os.Stderr
if err := cmd.Start(); err != nil {
fmt.Println("启动 systray_run.go 失败:", err)
return
}
if err := cmd.Wait(); err != nil {
fmt.Println("systray_run.go 执行失败:", err)
} }()
a.monitorPipe()
}
|
monitorPipe 方法监听子进程向主程序发送的数据,并根据接收到的指令进行操作,例如退出程序、显示或隐藏主窗口:
1
2
3
4
5
6
7
8
9
10
11
12
13
14
15
16
17
18
19
20
21
22
23
24
25
26
27
28
29
30
31
| func (a *App) monitorPipe() {
reader := bufio.NewReader(a.receivePipeR)
for {
line, err := reader.ReadString('\n')
if err != nil {
if err == io.EOF {
fmt.Println("管道关闭")
break
}
fmt.Println("读取管道数据失败:", err)
continue
}
fmt.Printf("从 systray_run.go 接收到: %s", line)
switch line {
case "systray_run: quit\n":
fmt.Println("收到退出请求")
closeType = 1
runtime.Quit(a.ctx)
break
case "systray_run: panel show\n":
fmt.Println("收到控制面板请求")
runtime.WindowShow(a.ctx)
break
case "systray_run: panel hide\n":
fmt.Println("收到控制面板请求")
runtime.WindowHide(a.ctx)
break
}
}}
|
子程序 systray 的实现
在 systray_run.go 中,托盘菜单设置了“控制面板”和“退出”选项。点击这些选项时,发送相应的指令给主程序。以下是主要的实现逻辑:
1
2
3
4
5
6
7
8
9
10
11
12
13
14
15
16
17
18
19
20
21
22
23
24
25
26
27
28
29
30
31
32
33
34
35
36
37
38
39
40
41
42
43
44
45
46
47
48
49
50
51
52
53
54
55
56
57
58
59
60
61
62
63
64
65
66
67
68
69
| package main
import (
"bufio"
"fmt" "github.com/getlantern/systray" "github.com/getlantern/systray/example/icon" "io" "os")
var show = true
func onReady() {
systray.SetIcon(icon.Data)
systray.SetTitle("CPU usage: 0%")
systray.SetTooltip("PFinal南丞")
Panel := systray.AddMenuItem("控制面板", "Panel")
mQuit := systray.AddMenuItem("退出", "Quit the whole app")
go func() {
for {
select {
case <-Panel.ClickedCh:
toggerPanel()
case <-mQuit.ClickedCh:
sendQuitMessage()
} } }() go ListenToMain()
mQuit.SetIcon(icon.Data)
Panel.SetIcon(icon.Data)
systray.Run(onReady, nil)
}
func ListenToMain() {
reader := bufio.NewReader(os.Stdin)
for {
line, err := reader.ReadString('\n')
if err != nil {
if err == io.EOF {
fmt.Println("管道关闭")
break
}
fmt.Println("读取标准输入失败:", err)
continue
}
fmt.Println("从标准输入读取到:" + line)
if line == "quit\n" {
fmt.Println("收到退出请求")
systray.Quit()
}
}}
func sendQuitMessage() {
_, _ = fmt.Fprintln(os.Stdout, "systray_run: quit")
systray.Quit()
}
var toggerPanel = func() {
if show {
show = false
_, _ = fmt.Fprintln(os.Stdout, "systray_run: panel hide")
} else {
show = true
_, _ = fmt.Fprintln(os.Stdout, "systray_run: panel show")
}
}
func main() {
onReady()
}
|
通过 ListenToMain 方法,监听来自 wails 主程序的消息,做出相应的操作,比如当接收到 quit 消息时,托盘程序将退出。
通过上面, 实现了 wails 与 systray 的协同工作,并通过管道实现了两个进程之间的通信。此方法不仅解决了 wails 原生不支持托盘功能的问题,还为今后多进程应用的开发提供了很好的参考
动态调整窗口大小
在之前的项目中,遇到了一个挑战:即如何在不同游戏之间保持窗口大小的一致性。这个问题最终通过查阅 wails 的文档得到了解决。发现可以动态地调整窗口大小,因此在代码中添加了对 runtime.WindowSetSize 和 runtime.WindowReload 的调用,以实现在游戏间切换时自动调整窗口尺寸的功能。
具体来说,Greet 方法不仅返回问候信息,还在每次调用时动态地设置了窗口大小,并重新加载了窗口,确保了用户体验的一致性和流畅性。
1
2
3
4
5
6
| func (a *App) Greet(name string) string {
runtime.WindowSetSize(a.ctx, 1000, 500)
runtime.WindowReload(a.ctx)
return fmt.Sprintf("Hello %s, It's show time!", name)
}
|
最后
通过上述功能的开发,实现了 窗口与 托盘程序的联动, 接下来就可以动手开发, 监听系统的功能了.
